From Headlights to Taillights: Getting Ready for Winter

By Mark Kozemko, Johnson College’s Automotive Technology Program Director

Originally published in the November 26, 2021 edition of the Valley Advantage.

https://www.thevalleyadvantage.com/community-columns/from-headlights-to-taillights-getting-ready-for-winter/article_fff3569a-a9c4-5855-90f1-9f52d5313b37.html

It is truly amazing just how quickly time passes. If you follow this column, you’ll remember that last fall, we addressed the topic of getting your vehicle ready for the upcoming winter weather. Since this is an important topic, and another winter is about to arrive, I want to revisit the topic. This year, I’ll go through the main things that need to be inspected, adjusted, repaired, or replaced before winter hits.

Before I get into the winterization checklist, I would like to answer a question I received recently about the vehicle’s HVAC (Heating, Ventilation, and Air Conditioning) system operation. The question is: “Why do my windows fog up when my heater is on?”

We used to see this condition frequently years ago when most vehicle HVAC systems were manually operated. These systems are now mainly automatic, so we rarely see this condition now in newer car models.

This condition happens because of the way the system operates when the heat mode is selected. There is a fresh air door that is supposed to be open in this mode. If that door is closed, the air circulating through the vehicle will be the air contained in the passenger compartment. This recycled air is always much too humid, meaning too much moisture compared to fresh air. Thus, the windows fog up.

Older vehicles usually have a knob or lever on the control panel that allows you to manually turn or push to select either fresh or recirculated air. In the heat mode, you should always choose the fresh air position. Fresh air will eliminate the fogging condition.

If you experience this fogging condition on more recent models, where the HVAC system is automatically controlled, there may be a problem with the fresh air door being stuck closed. That can happen if the motor that operates the door fails, or the door may be bound to a point where the motor cannot move the door at all. In that case, unless you are very mechanically inclined, contact a repair shop to diagnose and repair the problem. I hope this answers our reader’s questions.

Now let’s get to the vehicle winterization checklist.

1. Check your battery. If you have a multimeter, you can check your battery for available voltage, but you cannot check if it can hold a load, unless, of course, you are a master at using your meter. The meter can also check if your charging system is operating by checking the voltage across the battery terminals while the engine is running. Voltage readings while running should be around 14 volts, give or take a couple. A total battery, starting, and charging system check can be done by a qualified technician.

2. Check your tires. Most fuel stations provide air, but most of those places also charge for air. Free air can be found at Sheetz or your local Lowe’s store, usually by the contractor pick-up area. Whether you pay for the air or not, make sure the tire pressure is adjusted to the specification found on a sticker in the driver’s door jamb. You can check your tire pressure on your own. And remember, check and adjust the spare tire pressure.

3. Check your engine coolant protection. It will make sure the freezing temperatures of a Northeastern Pennsylvania winter will not freeze your engine coolant, which could be disastrous to your engine. You can perform this check using a very inexpensive tool purchased at any auto parts store. The perfect mixture of coolant and water for our area is a 50/50 mix. This mixture will protect the coolant from freezing up to -34°F. Now that’s cold! You can do this check by yourself.

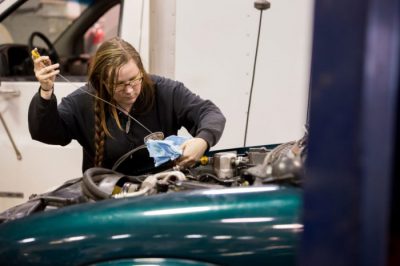
4. Check and top off all the rest of your vehicle’s fluids. The fluids include the washer solvent. Contrary to some opinions, the washer solvent is not an artesian well and does not refill itself. Other fluids to check include the transmission fluid and engine oil. As far as these checks, a vehicle owner can tackle them.

As far as prioritizing the checklist, you don’t necessarily have to follow any order, but all the checks should be completed. If you feel comfortable doing the checks, then, by all means, go for it. If you are not, have your repair shop check off the list. Either way, your vehicle will be ready for the winter of 2021-22.

From Headlights to Taillights: Vehicle Maintenance – Recommended or Required?

By Mark Kozemko, Johnson College’s Automotive Technology Program Director. Originally published in the September 24, 2021 edition of the Valley Advantage.

https://www.thevalleyadvantage.com/community-columns/from-headlights-to-taillights-vehicle-maintenance-recommended-or-required/article_4e0ed64d-ba35-5431-93f8-0808466020ca.html

As another summer goes in the record books and everyone starts to plan their winter travels, questions about vehicle maintenance continue to be on everyone’s minds. This month, we’re fielding questions from concerned vehicle owners about the infamous maintenance schedule they find in their owner’s manuals.

Our first question is, “I often wonder, do I really have to do the maintenance at every single interval on the schedule?”

If you’re scratching your head about the question, let me explain it. A typical maintenance schedule found in your vehicle’s owner’s manual will be in table form, listing mileage intervals across the top and maintenance items down the left side. The manufacturer determines the mileage intervals.

For instance, my 2017 Ram 1500 pickup mileage intervals are every 10,000 miles beginning at 20,000 miles. There is also a row with years that appears under the mileage. Some of us don’t drive as much, so maintenance is completed yearly instead of according to miles traveled.

Maintenance items that need attention range from a simple inspection of that item to total replacement. Many things don’t need to be replaced for 50,000 to 100,000 miles. Items that require regular replacing include the engine oil and filter, fuel and air filters.

Okay, now to answer the question asked: Yes, you really have to do the maintenance listed at every mileage interval. Why? Well, replacement or inspections are done at specific intervals to prevent significant repairs in the future, thus, the term, “preventative maintenance.” When preventative maintenance is performed correctly, the owner will get as much out of their vehicle as they possibly can.

If you’ve been following this column every month, you may remember me stating that engine oil changes are the cheapest maintenance you can do to prolong the life of your engine. A clean engine is a happy engine and will perform flawlessly for quite a long time. That’s just one example of preventative maintenance.

“Are all the services the same at each interval?” is our second question.

There may be certain things, such as changing the engine oil and filter that you will have to do at each interval. Other things, not so much. For example, the spark plugs in my 5.7-liter Hemi engine require replacement at 100,000 miles, so if you remember from above, the service intervals on my vehicle are every 10,000 miles. My truck will have already received somewhere around 10 maintenance services by the time I replace my spark plugs.

I want to add that this spark plug replacement requirement is different from a few decades ago, when replacements were required every year. Back then, this was called a tune-up.

Some items are inspected at each interval but do not need to be replaced until they reach the end of their useful life. For instance, an air filter may last through four service intervals if the vehicle is only driven in a clean, dust-free environment. If you drive your car or truck in very dirty or dusty situations, the filter will have to be replaced every interval due to severe usage.

Our third question is, “Can I get away with skipping any of the services?”

I guess you can, but you may hear someone tell you, “I told you so,” because something simple that needed attention at the service interval you skipped turned into a high-dollar repair later on down the road.

“Is there a more cost-effective way to maintain my vehicle so I don’t have to incur the cost of the maintenance packages?” is our fourth and final question this month.

The bottom line is that the most cost-effective way to maintain your vehicle is to follow the maintenance schedule to the letter. In the long run, the money you spend on the maintenance packages per the schedule will be significantly less than the expensive repairs that will come because you skipped one or more of your scheduled maintenances.

Keep in mind that a vehicle under warranty will always require you to follow the maintenance schedule. If a catastrophic failure should happen to your car or truck, the first thing the manufacturer will ask for is maintenance records. If maintenance hasn’t been completed per their recommended schedule, your repair will most likely come out of your pocket. Those costs can add up very quickly.

As you think about preparing your vehicle for your winter travels, make sure you know what is really recommended and required on your vehicle’s maintenance schedule. It could mean saving money and, more importantly, getting you safely to your winter destination.

From Headlights to Taillights: Towing the Line

By Mark Kozemko, Johnson College’s Automotive Technology Program Director

Original published in the August 27, 2021 edition of the Valley Advantage.

https://www.thevalleyadvantage.com/community-columns/from-headlights-to-taillights-towing-the-line/article_05518445-349e-5a52-af84-19709c71143e.html

Summertime is not only about vacation time. It’s also about summer fun. By that, I mean camping, boating, jet skiing, and the like, all of which include towing something with your vehicle.

Over the last few weeks, a few readers submitted questions about towing, so I thought we’d answer a few this month.

Our first question is, “I want to buy a boat, but I’m not sure if my vehicle will tow it. Will I have to purchase a truck or other vehicle to get my new boat to the lake?”

It’s a great question. Most people I know who tow something have a truck to pull whatever they’re hauling.

A truck or large vehicle is not always necessary, and here’s why. The first thing you need to know is the camper weight or the weight of the boat with a trailer, jet ski(s) with a trailer, or whatever you’re towing. Usually, the information is on the vessel you’re planning to pull. The camper will have only one weight to consider, but the other towable items will have their weight plus the trailer weight. The total weight of the item and its trailer, if necessary, is called the Gross Combined Weight Rating, or GCWR.

The next thing you need to know is your vehicle’s towing capacity. Your car or truck manufacturer determines the towing capacity and lists this information in the vehicle’s owner’s manual. Of course, you can always Google your year, make and model to find this information, too.

Here are a few examples of towing capacity from https://auto.howstuffworks.com/. A 2009 Toyota Camry can tow a maximum of 1,000 pounds while a 2009 Toyota 4Runner can tow a maximum of 5,000 pounds. A 2009 Dodge Ram 1500 can tow a maximum of 3,800 pounds, and a 2009 Dodge Ram 3500 can tow up to 12,300 pounds.

As you can see from the examples, your current vehicle may be enough to get you — and your summer fun vessel — to your destination with no problems. Just remember, never exceed your vehicle’s maximum towing capacity. Doing so can cause significant damage to your vehicle’s engine or transmission.

“What is tongue weight?” is our second question.

Tongue weight is the weight put on the hitch at the connection of the trailer to the vehicle. A vehicle suspension is designed to carry a certain amount of weight. The weight is mainly made up of the vehicle itself, but the suspension can take additional weight when towing. The car or truck, and a specific hitch class, can carry a certain amount of weight.

If you connect your boat or whatever is on the trailer to your vehicle and the rear of the vehicle sags where the rear bumper is close to the ground, then your tongue weight is probably too much.

Our third question is, “If the tongue weight is too high, does this mean the vehicle is not capable of towing what I have connected?”

If connecting to the vehicle causes too much sag, it most likely means your vehicle cannot tow this particular unit. But, there is a chance the boat or whatever is on the trailer is not positioned on the trailer correctly. Let me explain.

If a boat and trailer have a combined weight of 950 pounds and you’re using a 2009 Toyota Camry that can safely tow 1,000 pounds to tow it, we know the weight is under the maximum towing capacity.

However, if the tongue weight is too high, the excess weight causes the rear of the vehicle to sag excessively. This extra weight can create an unsafe driving condition. When we investigate a bit further, we find the boat is too far forward on the trailer, and this adds to the tongue weight. The boat’s position on the trailer needs to be adjusted to get the boat weight back over the wheels of the trailer. When we do this, the tongue weight and the sagging condition are corrected.

“Do I need a special tow hitch on my vehicle?” is our fourth and final question.

Tow hitches are designated by class. The class of the hitch is determined by the tongue weight capacity and the towing capacity. The hitch class goes from a Class I hitch with a tongue weight capacity of 100–150 pounds and a towing capacity of 1,000–1,500 pounds to a Class IV hitch with a tongue weight capacity of 500 pounds or more and a towing capacity of 10,000 pounds. Your vehicle’s towing capacity will determine what class hitch you should have installed to meet all the safety requirements.

Remember that safety is always first, so be safe, no matter what your choice of summer fun may be.

From Headlights To Taillights: Springing Ahead With Vehicle Maintenance

By Mark Kozemko, Johnson College’s Automotive Technology Program Director. Originally published in the February 26, 2021 edition of the Valley Advantage. https://bit.ly/30cbvdk

It’s been a snowy February, but per Punxsutawney Phil, spring is on its way. It’s just going to take a little while longer to get here. As we’re preparing to say goodbye to snow and hello to warmer weather, we’re receiving questions about car maintenance that may be required after the long, cold winter. Let’s get to them so you can plan ahead.

Our first question is, “Should my car battery be replaced after the long winter we’re experiencing this year?”

Before you go and replace your battery, I recommend having it inspected and tested first. As I said in a previous column, your vehicle battery is one of — if not the most — important component to get your vehicle through a rough winter. If you had your battery inspected and tested in the fall, you should have it re-tested. Even though it had enough life to get you through the winter, that doesn’t mean its power is stable enough to keep you going throughout the spring and into summer. Extended periods of below-freezing temperatures, which we’ve experienced this year, weaken and take a lot out of a battery. Take the time now to get a new inspection and test to determine if your battery requires replacement.

“Does my engine oil need to be changed after the cold winter months?” is our second question.

When we discussed oil change intervals in a previous column, I recommended that you keep your maintenance schedule on track throughout the year and I’m sticking with that recommendation. Oil changes are the most economical maintenance you can do to drastically extend the life of your vehicle’s engine. Don’t go beyond the recommended time or mileage between oil changes, but you can change your vehicle’s oil sooner or more often than recommended. As the vehicle owner, it’s your call on whether you think the mileage or time is close enough to put fresh oil in your engine.

“Is there such a thing as summer and winter air that I should put in my tires?” is our third question.

There is no such thing as summer or winter air. It’s just compressed air.

You can, however, have your tires inflated with nitrogen, which helps eliminate oxidation and corrosion. Nitrogen pressure in a tire will bleed off or dissipate much slower than compressed air and you’ll see slightly higher fuel mileage with it. If you’re thinking about using nitrogen, it is considered a green alternative, which means it’s better for the environment. One thing to keep in mind, with compressed air, you can check and adjust your own tire pressure. If you use nitrogen, you’ll have to find a repair shop equipped with it to adjust your pressure. It will cost you to have your tires inflated with nitrogen more than you pay for compressed air.

Our final question is actually two questions, “How do I clean the buildup of salt and chemicals that accumulated under my car over the winter?” and “Can I do it myself?”

The best way to clean the underbody of your vehicle is by using a pressure washer. Most repair shops have pressure washers that are used for a variety of jobs, including cleaning customer vehicle undercarriages. These pressure washers come in many different pressures and gallons per minute. They also have several different spray tips, from wide-angle to a pencil spray, and include attachments that connect to the hose and slide under the vehicle, making it easier for technicians to get the undercarriage clean. Prices range for this service at repair shops or body shops.

Can you do it yourself? Yes, but you’ll have to purchase a pressure washer and attachments. The consumer versions come in a variety of pressures and usually two power options, gasoline or electric. The good news is, you have choices for your individual needs and situations. Keep in mind, to make any of these pressure washers work as designed, you will need a water supply. Lastly, you have to be ready to get wet!

With these steps and, of course, guidance from your automotive technician, your vehicle will be back in shape after enduring a cold and snowy northeastern Pennsylvania winter. I’m not sure about you, but I’m hoping next year Punxsutawney Phil doesn’t see his shadow and we’ll get an early spring.

From Headlights to Taillights: The Dreaded Check Engine Light

By Mark Kozemko, Johnson College’s Automotive Technology Program Director

Original published in the November 27, 2020 edition of the Valley Advantage.

https://www.thevalleyadvantage.com/community-columns/from-headlights-to-taillights-the-dreaded-check-engine-light/article_edec944f-ae6a-5b97-8ea1-09f9de9997ad.html

We’ve all been there.

The check engine light illuminates on the dash and suddenly you panic a little and ask yourself, “What’s happened and how do I make it go out?” No one likes it when this warning light comes on.

Today, I’ll address some of the common questions concerning the dreaded check engine light. Hopefully, this will help you put your mind at ease and help decrease the amount of anxiety that may arise the next time it comes on.

Remember, your vehicle is very complicated — and smart. The engine and drivetrain management systems are constantly monitoring driver inputs and outputs from various sensors in the engine, transmission and drive line.

Our first question is, “What issues cause the check engine light to come on?”

The most common issue is a challenge with your fuel cap. The fuel systems on modern vehicles are sealed systems. This means the systems are not supposed to allow fuel vapors into the atmosphere. If the seal on the fuel cap is damaged or even just dirty, it may cause a leak in the fuel system pressure. A loose or missing cap will do the same.

A second issue can be a faulty or dirty Mass Air Flow sensor, or MAF. This sensor monitors the amount of air entering the intake system of the engine. All the other components react to this amount of air being sent to the Powertrain Control Module.

Your vehicle’s oxygen sensors that monitor the oxygen in the exhaust system can also cause the check engine light to pop on. If the sensors are not sending the correct information, or not sending any information at all, the control unit will attempt to compensate for the information received. Sometimes the control unit can make those compensations. Other times, it will turn on the check engine light.

The last common issue is old and worn out spark plugs. When spark plugs wear, the gap that the spark has to jump across becomes larger and makes it more difficult for it to make its jump. This creates a misfire in the cylinder and reduces engine performance.

“What do I do when the check engine light comes on?” is our second question.

The first thing to do is check if your gas cap is there. I know, it sounds funny, but how many times have you seen vehicles traveling down the road with their fuel door open and the cap blowing in the wind? Or, maybe you’ve done it yourself!

If the cap is there, remove it to check the seal. When you put it back on, make sure it’s tight. If the seal is dirty, clean it and then tighten it correctly when you put it back on. If this was the issue, the check engine light will go out after a few cold starts or key cycles. If the light stays on, it’s time to visit a repair shop.

This leads us to our third question, “If the check engine light is on, is it safe to drive my vehicle to a repair shop?”

Usually, when the check engine light comes on, it will stay on steady, and you may not notice a difference in your vehicle’s performance. However, when you fill up at the pump, you may notice you’re taking on more fuel than usual. If this is the case, you should be able to drive the vehicle to your repair shop to be diagnosed.

If your vehicle experiences major misfire conditions, the check engine light will flash. This indicates the problem is current and you should not drive it to the shop. In extreme cases, most vehicle systems are designed to either shut down or go into a limp mode. This is when it’s time to call a tow truck.

Our fourth and final question is, “Is there a tool I can buy that tells me why the check engine light came on?”

If you’re a do-it-yourselfer, you can purchase an inexpensive code reader from your local parts store or online. These code readers will not repair your vehicle, but they can steer you in the right direction as to what caused the check engine light to come on. They can also ease your mind as to the seriousness of the problem.

When your check engine light comes on, please, don’t delay having it diagnosed and repaired as soon as possible. If you wait and continue to drive it, additional damage may cause repair costs to be a lot higher than if you had it diagnosed in a timely manner.

The check engine light is very helpful. Listen to it. Don’t fear it.

Continuing Education Offers PA State Vehicle Safety Inspection Course

Johnson College’s Continuing Education Program will be holding a Pennsylvania State Vehicle Safety Inspection course on campus March 1, 3, 8 & 10, 2021 from 6 p.m. to 9 p.m. Space is limited. The total cost of the course is $200 for cars and light trucks. There is additional $75 fee for other vehicle categories. To learn more or to enroll, visit johnson.edu/continuingeducation or contact the Continuing Education Department at 570-702-8979 or continuinged@johnson.edu.

The Pennsylvania State Vehicle Safety Inspection course requirements include 12 classroom hours, a written test and a two-hour tactile test scheduled independently with the instructor. All must be completed before receiving certification from PennDOT. Registration is on a first-come, first-served basis according to the date of payment. Class size is limited to 12 students so participants are encouraged to register early. Applicants must be at least 18 years of age and have a valid operator’s license for each class of vehicle they intend to inspect. Classes will be held in the Automotive Center of the Weaver Building on the Johnson College campus.

Those who successfully pass the exam, will be certified to review, assemble and complete applications and documents related to reconstructed, specially constructed, modified, flood, recovered theft, collectible vehicles and street rods.

Johnson College’s Continuing Education Program distinguishes itself from the College’s 2-year degree programs and certificate courses by providing its adult students the opportunity to improve their skills to stay ahead of the competition, learn new technologies, and advance in their current career. The Continuing Education courses, many taught by industry professionals, are utilized and recognized by industry partners because they’re developed in partnership with industry. The program also includes pre-employment skills testing and exclusive online courses offering certification classes for essential industries. Johnson College also assists individual students and industry partners in obtaining funding or grants so their continuing education courses are cost effective. We train the workforce of northeastern Pennsylvania by immersing our continuing education, degree and certificate earning students in industry from day one. We Work, so our students succeed. For additional information on Johnson College’s Continuing Education Program, please call 570-702-8979, email continuinged@johnson.edu, or visit Johnson.edu/continuingeducation.

Headlights to Taillights: Winter is coming, is your vehicle ready?

By Mark Kozemko, Johnson College’s Automotive Technology Program Director

Original published in the October 23, 2020 edition of the Valley Advantage.

https://www.thevalleyadvantage.com/community-columns/headlights-to-taillights-winter-is-coming-is-your-vehicle-ready/article_db15e1b5-d8ef-5d52-b635-c219b11105a6.html

You know winter is fast approaching when leaves start hitting the ground and temperatures drop, like they are now.

Most households have a winterization processes in place. They can include rearranging the closet, so winter clothes are out front, removing air conditioners from windows and preparing the furnace for winter operation.

While you’re working on winterizing your home, you also need to have a plan for your vehicles. This brings us to a few questions I received about how to winterize a vehicle to ensure it runs smoothly through the coldest months of the year.

The first question is, “What steps in the winterization process are priorities and which aren’t?”

All the steps below in your vehicle winterization process are priorities, but they don’t have to be completed in the specific order they’re listed.

Priority No. 1 is your battery. There’s nothing worse than getting in your cold vehicle, turning the key and hearing a clicking noise — or maybe nothing at all.

A battery will not always give you a warning before it fails. They can fail at any time, but cold weather really affects a weak battery. Have your battery tested to determine the current condition, so you know if your battery needs to be replaced so you don’t experience that no-start moment.

Priority No. 2 is the depth of your tires’ treads. There needs to be enough tread to keep the tire safe through the season. The more tread, the better. If you’re someone who uses winter tires, now is the time to swap out the summer tires for winter ones. Remember, if you install studded winter tires, they cannot be installed on your vehicle until Nov. 1, and must be removed by April 15.

With all or most vehicles being equipped with tire pressure monitor systems, it is very important to check and adjust the tire pressure. In cold weather, tire pressure is lower than it would be in warmer weather. This lower pressure, if not corrected, may trigger the tire pressure warning light to illuminate on your dashboard. If it does, check your pressure immediately and add air where needed.

Something very few people think of is the spare tire. If your vehicle comes with a spare, make sure it’s inflated to the proper air pressure.

Priority No. 3 is a coolant freeze protection check. During the check, a sample of your vehicle’s coolant is tested for the concentration of ethylene-glycol in the coolant mixture. This means the percentage of water compared to the percentage of anti-freeze in the mixture. An acceptable mixture for our northeast region is 50/50. This mixture gives the coolant a freeze protection of approximately -34⁰F. If your coolant isn’t protected correctly, it can ice up and cause catastrophic damage to your engine.

Priority No. 4 is checking and monitoring your vehicle’s other fluids through the winter months. The windshield washer reservoir should be filled with a solvent specially made with a lower freeze point than plain water, much like coolant.

Priority No. 5 is the condition of your wiper blades. If your blades aren’t in good condition, they will not be able to properly clear ice and snow from your windshield. As you know, if your windshield isn’t cleared, your vision will be obstructed and the possibility of an accident increases.

Priority No. 6 is preparing a small survival kit to put in your trunk just in case you break down. This kit should include items such as gloves, socks, a blanket or another winter coat, and anything else you might need while you wait for assistance to arrive. No matter when you use your car, always make sure your cell phone is fully charged or close to it. You don’t want to break down in the dead of winter with a cell phone that doesn’t work.

“What steps in the winterization process can be done by an owner and which ones must be completed by a technician?” is our second question.

The battery and coolant freeze point checks should be performed by a qualified technician. The other checks and inspections in our winterization process above can also be completed by a technician, but you can easily do them over a weekend. Equipment, tools and, of course, replacement parts needed for your vehicle winterization project are more than likely available at your local parts store.

However you decide to winterize your vehicle, make sure you do it. This process will help you avoid any major automotive issues during the long, cold winter months.

The next Headlights to Taillights column will be published in the November 27, 2020 edition of the Valley Advantage. 

From Headlights to Taillights: Clearing the Air

By Mark Kozemko, Johnson College’s Automotive Technology Program Director

Original published in the September 4, 2020 edition of the Valley Advantage. https://www.thevalleyadvantage.com/community-columns/from-headlights-to-taillights-clearing-the-air/article_d51da5d8-cb42-5c02-b5df-ebb3c0c00f44.html

We all try to breathe the cleanest air possible. Our body’s natural air filter located in our breathing system usually does a fine job. Unless, of course, we have a cold or allergy which results in a stuffy nose. When this happens we can’t breathe properly. The condition makes us feel tired and sluggish. We’ve all been there, right?

If your vehicle’s engine or heating, ventilation and air conditioning (HVAC) breathing systems can’t breathe correctly, your vehicle gets tired and sluggish, too. This is caused by your vehicle’s air filters not performing properly due to being dirty, or simple wear and tear.

Today, we’re talking about air filters that help your vehicle breathe. Below are a few questions I received about vehicle air filters. So let’s get started.

The first question is, “Are there different types of air filters in a car, and what do they do?”

Yes, each vehicle has different types of air filters. Late model vehicles have at least two different air filters as standard equipment. The first filter is the engine intake air filter and the second is the heating/cooling system intake air filter, or cabin filter. If you have a vehicle equipped with air brakes, normally a heavy duty truck, it will also have an intake air filter for the air compressor, which is the heart of the air brakes.

Now let’s talk about what each one does for your vehicle.

The engine intake air filter is designed to filter the air that the engine uses for combustion in the cylinders. Not only does it filter the air going into an engine, it allows the proper amount of air in to produce optimum combustion. When an engine intake air filter is dirty, the air flow becomes restricted and combustion may not be complete. The restricted air flow causes an engine to run poorly and use more fuel because the cylinders are not getting the correct amount of air. This condition will decrease fuel mileage and may also cause black smoke from the exhaust.

The cabin air filter filters air coming into the passenger compartment/cabin. Modern vehicles have systems constantly circulating air through the cabin using outside air. The filter catches pollutants, debris and allergens that can get into your vehicle. This filter can get clogged and pretty nasty. If you ever see a dirty cabin filter, it will make you wonder about the air we breathe on a regular basis.

The intake air filter inside air brakes filters air taken into the compressor used to operate the air brake system. Needless to say, if this filter blocks up and restricts air flow to the compressor, the results can be devastating because the brakes will not work.

You vehicle’s air filters should be checked often. If the filters are left unchecked, engines may run poorly, cabin air quality and air flow may diminish, or brake systems will not function properly.

“How often do they need to be changed?” is our second question.

Manufacturers suggest service intervals for each of the air filters in your vehicle. These service intervals are for vehicles driven in what manufactures call normal conditions. Driving on dirt or dusty roads, through construction areas — we know there are plenty of those in northeastern Pennsylvania — and poor air quality are contributors to decreasing the lifespan of your air filters. At the very least, you should always follow the service and replacement intervals noted in your vehicle’s owner’s manual. As with any service, it doesn’t hurt to do it more often but I recommend that you don’t extend the time between air filter services.

Our final question is, “Can the filters be changed by owners or must they be changed by technicians?”

If you’re an owner who is comfortable performing some of your own maintenance, you shouldn’t have any challenges replacing the engine intake or cabin filters. Keep in mind some cabin filters are very hard to find because they’re tucked under the dashboard. If you’re not comfortable, by all means, have your repair shop do the service.

You may not see your vehicle’s air filters or even think about them often, but they do need your, or a service technician’s, attention from time to time. They’re vital to keeping your vehicle performing efficiently and making sure you and your passengers breathe the cleanest air possible.

The next Headlights to Taillights column will be published in the September 25, 2020 edition of the Valley Advantage.